I’ve been very happy to work on Justine Cunha‘s wonderful illustrations recently, and I’m going to share my process with you. What’s interesting is that those characters were… Well, illustrations. They were not meant to be animated at all, so it could be a bit tricky to adapt them. The technique I used, Duik in After Effects, seems to be one of the easiest way to do this, animate illustrations, without having to adapt the style.
What’s great with animation in After Effects, is that you work on the actual illustrations, you don’t have to re-draw them. This means they can be very detailed, with textures, shadows and small details, which would be impossible if you had to draw each frame by hand like with more traditional 2D animation.
A few months ago, I’ve decided with Rainbox to create a comprehensive animation course on video (in French for now, but an English version is on its way), to be released on the internet. I wanted to work and share original characters, so I asked my friend Justine if I could use some of her illustrations. I’m glad she said yes, but I still had a lot of work to be able to animate her characters. Thanks to the help of Léa Saint-Raymond, we could achieve this quite quickly, this is our process.
Choosing the characters
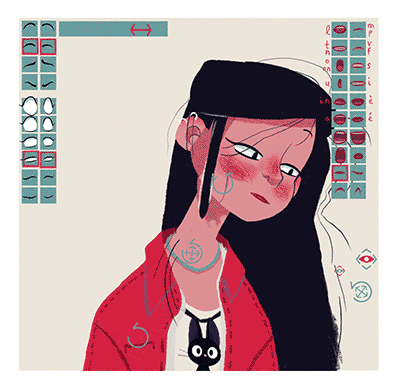
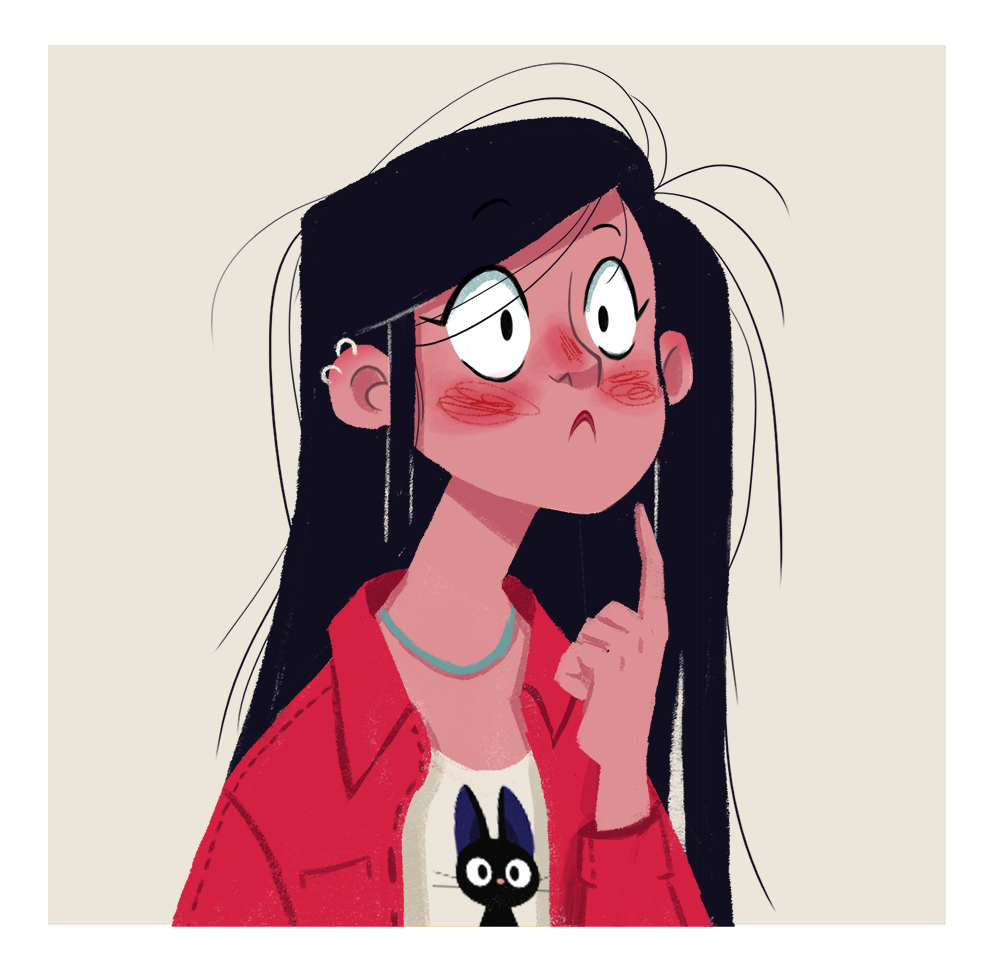
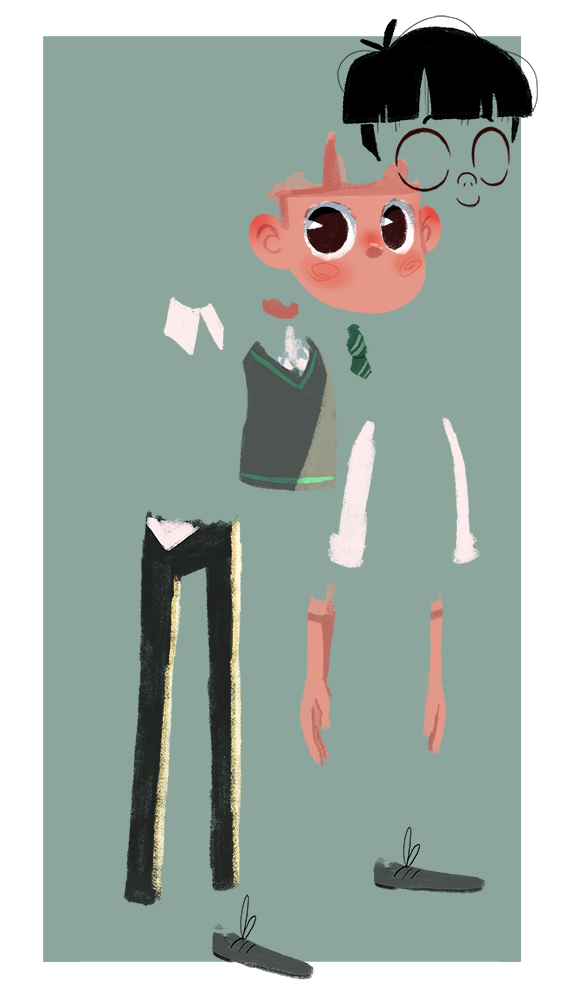
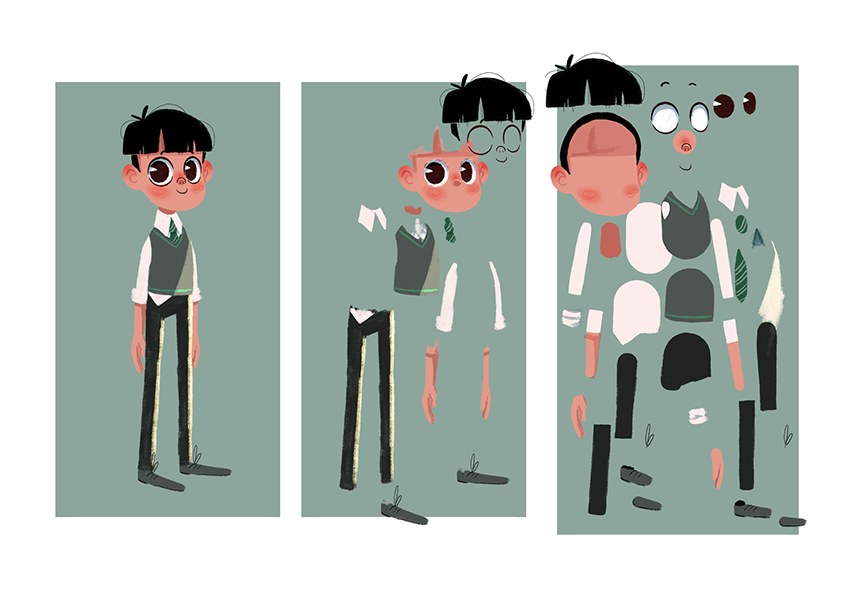
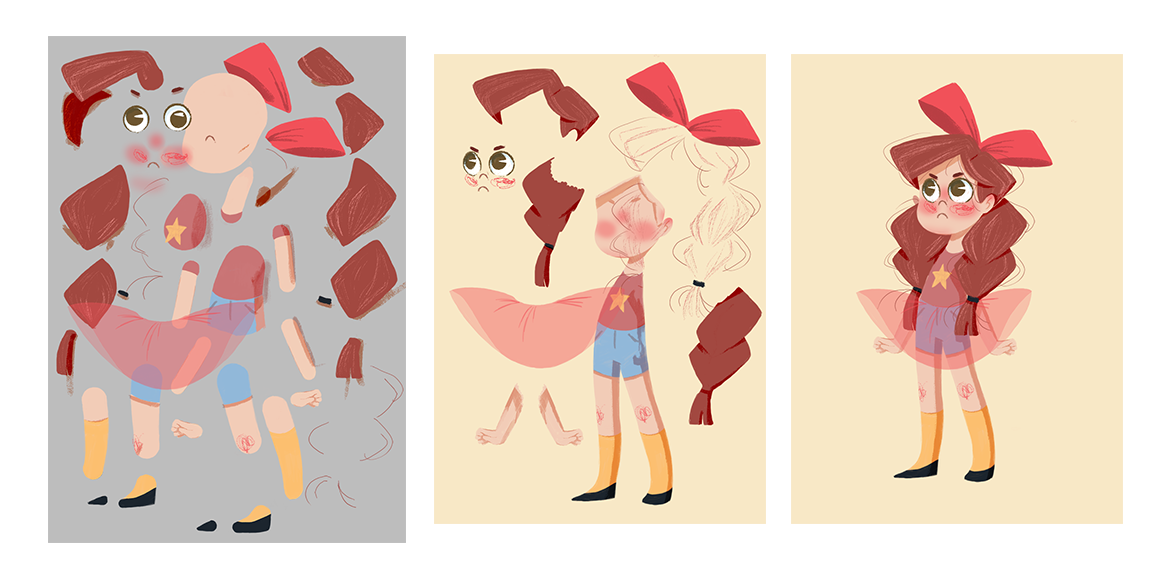
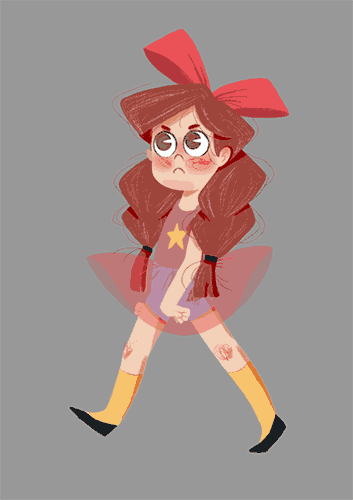
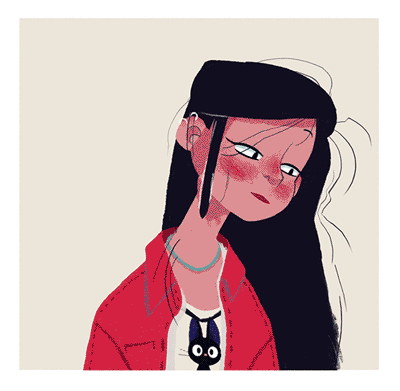
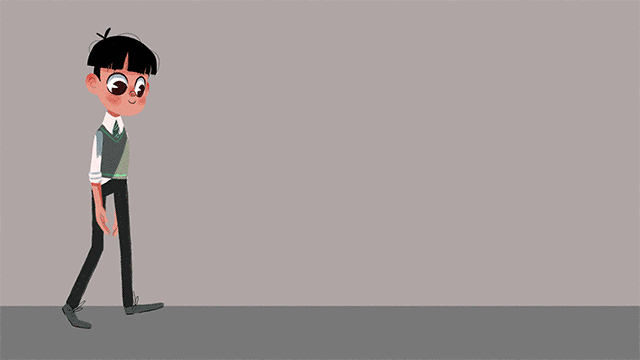
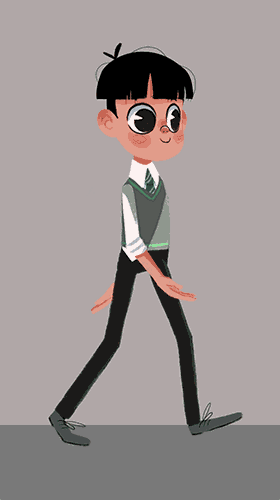
I needed two types of characters: one standing, to be able to animate a walk cycle and all sorts of actions, and a close-up to animate a dialogue and do some more precise acting. Justine did not have enough time to create characters specially for this course, so I had to pick in her past illustrations (click on the images to have a better look at them. And do have a look at them, they’re gorgeous).
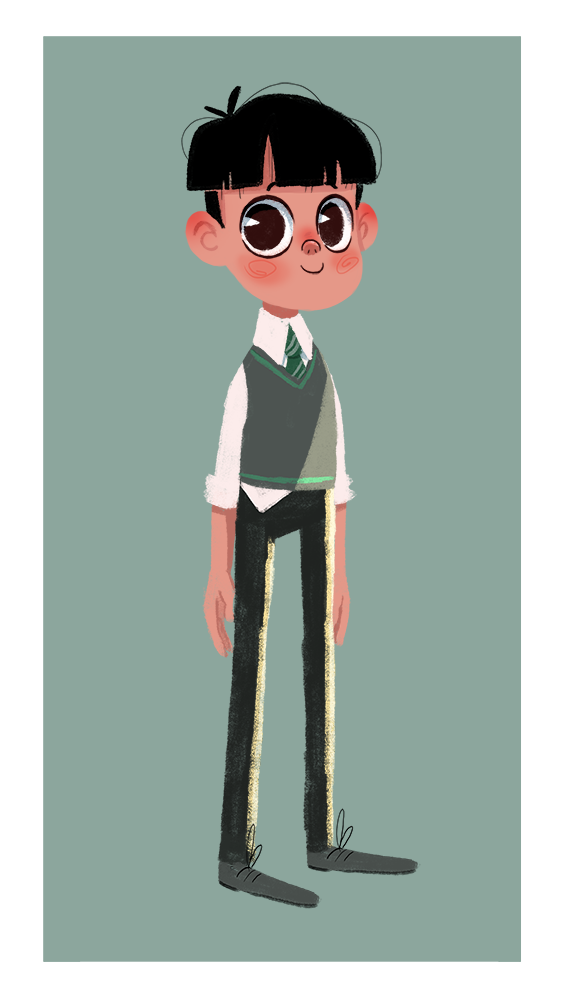
I had my two characters, both were ideal for 2D animation, and I saw that they could “easily” be adapted for my cut-out technique in After Effects. Because Adobe After Effects is not a traditional, hand-drawn animation software (actually, it was not made for animation at all, but for compositing), I had to pick characters in this particular pose, where the body can be oriented three quarters from the camera (which is visually nicer than profile or front), but the legs and arms had to be on the side, able to translate in 2 dimensions only without breaking the perspective. To state this in a simpler way: although I was going to animate this digitally, I needed characters which could be printed and animated as real paper cut characters.
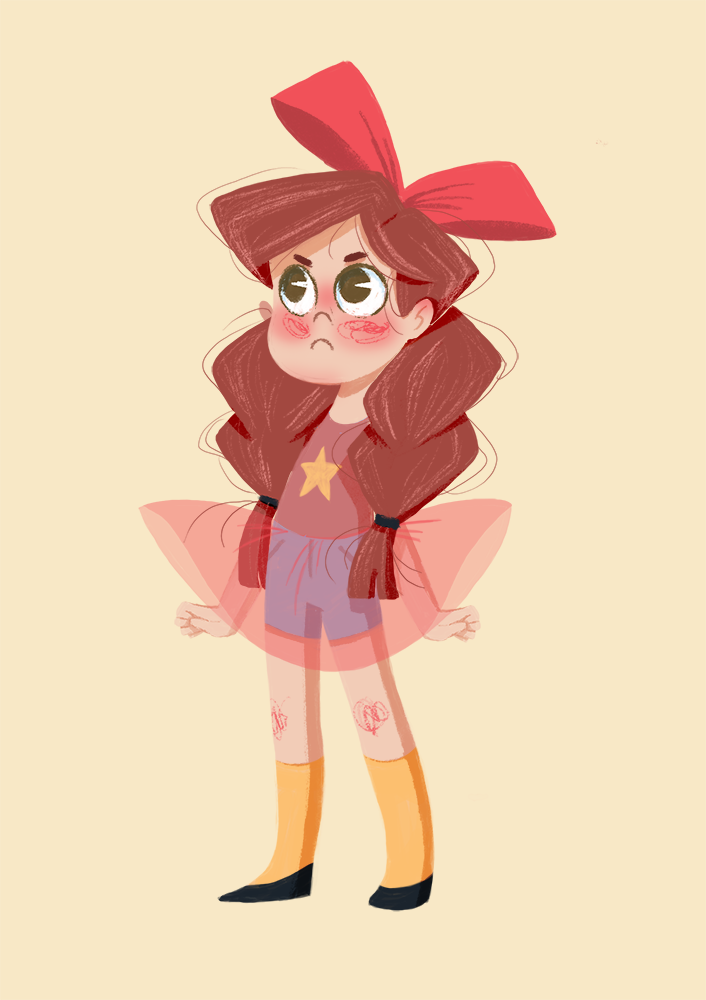
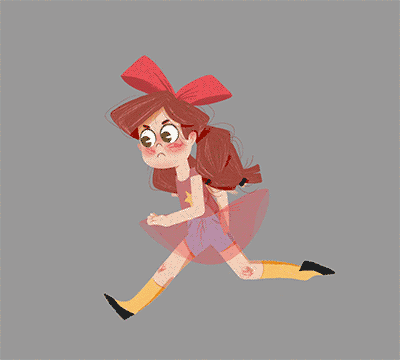
As I truly loved those designs, I could not resist to pick a third one, to animate a more expressive walk cycle than what I was going to do with Goyle.
Adapting the characters for animation
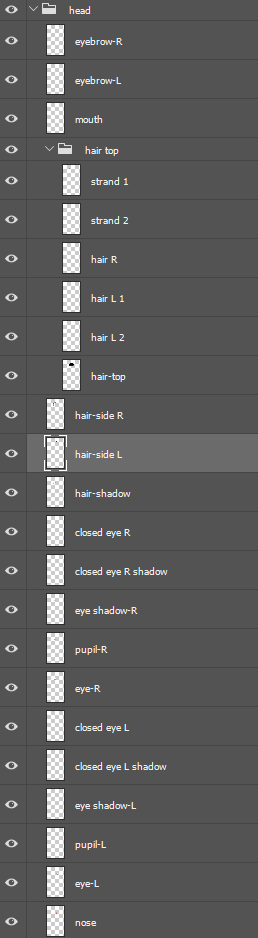
Justine was kind enough to give me here Adobe Photoshop source files – where she had kept different parts of the characters in separated layers – but as they were never meant to be animated, the layers could not be used as they were…
With Léa, we had to separate each part which had to move in the animation: cut the hands, the toes, the legs in two parts, separate the eyes from the face to be able to move them, etc. That was the first step in this work, a lot of organization and drawing in Photoshop.
In the process, we lost some subtleties of the illustrations, this rough aspect I like, and some textures. We could have re-drawn them, but as we were just working for some tutorials, we did not have that time to do it.
In the end, the Photoshop files were quite big, with a LOT of layers…
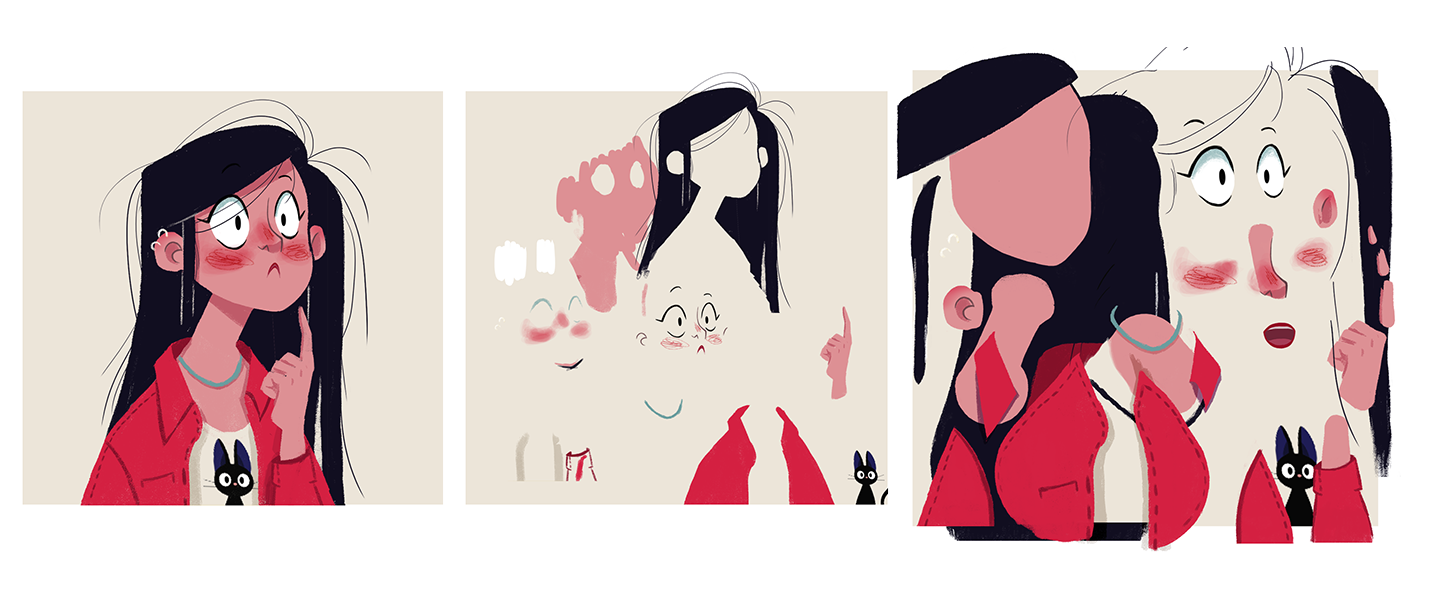
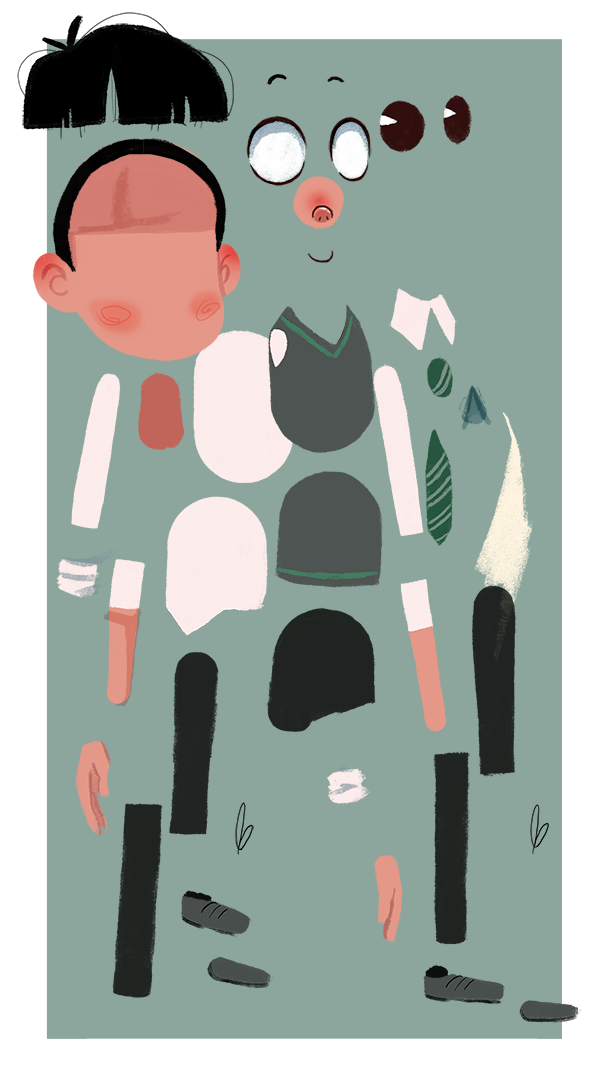
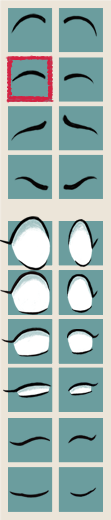
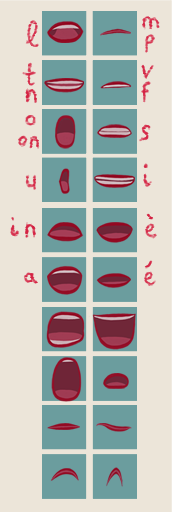
For this latest character, Whome, we had a bit more work, as the goal was to animate a dialogue, and work with expressions, we had to draw a library of expressions, for the eyes, the eyebrows, the mouth…
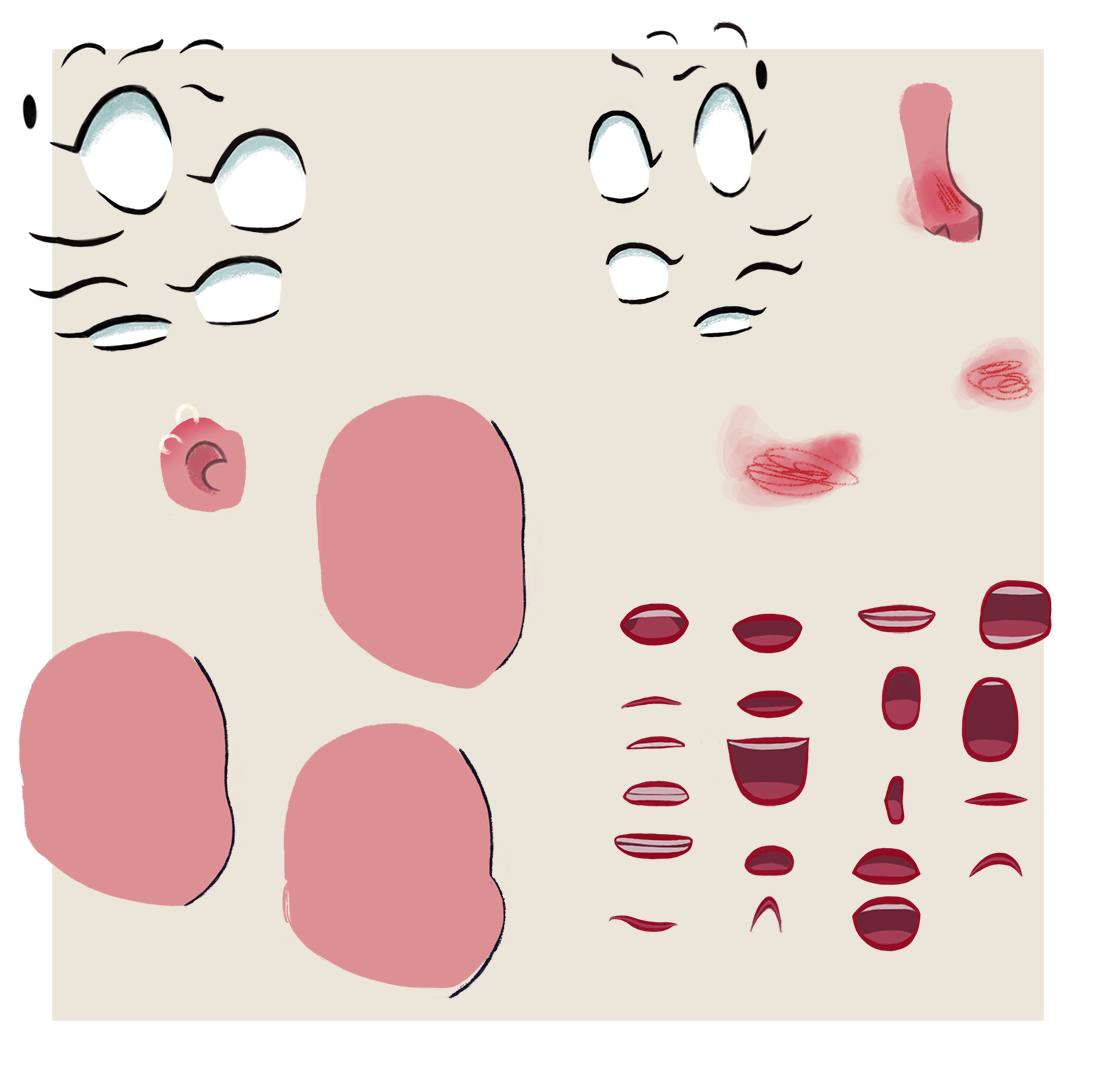
As I really don’t like animations where the mouth moves but not the chin, we even drew three head shapes, to adapt the shape depending on the mouth displayed.
Rigging!
At this point, we were ready to bring those files into After Effects to setup the characters, create their rigs. To do this, we had an extensive use of Duik, a rigging and animation tool set I have developped for After Effects, which works a bit like the rigs which can be done in 3D softwares.
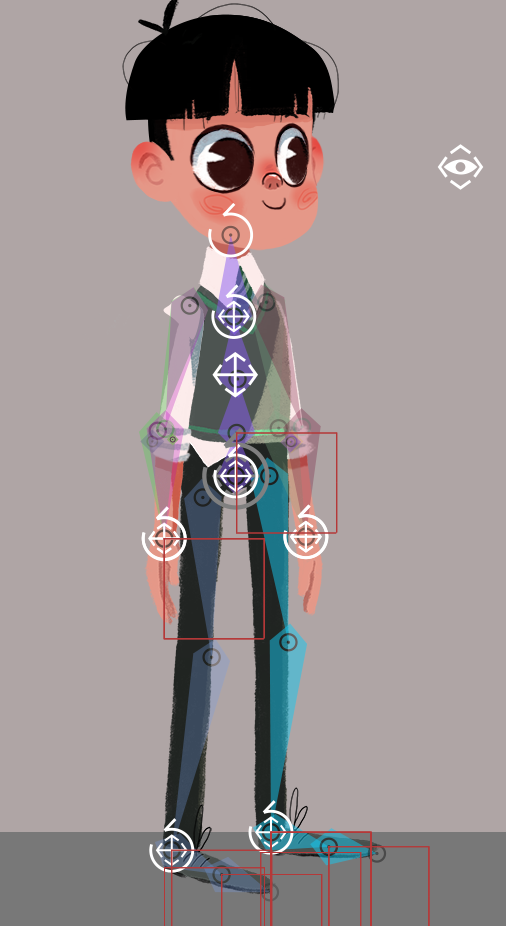
These rigs, these structures which drive the different parts of the characters, make them way easier to animate, with nice and intuitive controllers.
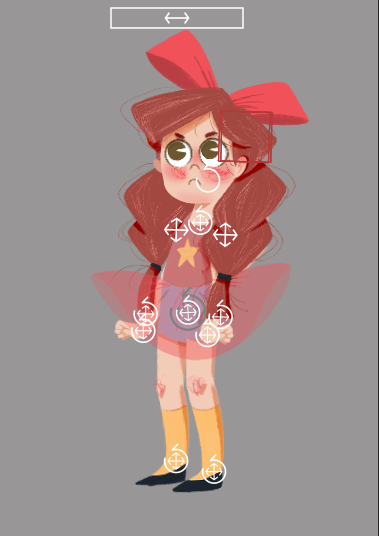
To make it even easier to animate the talking character, we’ve built some selectors in Photoshop which were rigged in After Effects to control the opacity (thus the display) of the expressions.
AAAANNND… Animation!
This is the result of all this work.
If you want to learn 2D rigging and animation in After Effects, you can follow our two courses on tuto.com: rigging for beginners, and the animation course (in French, will be available in English soon!).
The animation process is described in more details in this new article.
Click on the images if the animations are not playing correctly.

16 Comments
Add Yours[…] Behind the scenes: From illustration to animation! […]
Hello, I´m from Mexico and I’m very interested in adquiring this wonderful course.
One question. If I buy it now, will I have the english version when you release it? (Sorry for the bad english)
Thanks!
Sorry for the late reply!
You won’t get it automatically in English if you buy it now in French, BUT if you ask us through our contact form, we’ll sure give you a free coupon as soon as it’s available if you bought it in French.
Hey 🙂 Is there still no English version?
Thank’s,
Bernhard
English version for what?
Oh, sorry, you must be talking about the video course. No, we did not have enough time to translate it yet, but we’re still working on it…
This is amazing! Well done! It looks really difficult and only someone with real talent like you would be able to pull it off! I’d love to try this, but it looks way to difficult for me. Haha! I just wanted to say how much of an amazing animator I think you are, and that you should definitely consider expanding it (maybe by working in animation for shows)! Well done, and commend you for your work!
Awesome post. Thank you so much for sharing this post. Really helpful for me
Is there an english version? My french is not what it should be :((.
J’en es trouvé la video tuto en français. Merci! Don’t need to apologize for less than perfect english, eh? Look at my french :).
Thanks again.
Hello
is there a chance to put a tutorial for making whome character like in 3 part painting, rigging and animation?
I like it so much and I really congrats you for your creativity and your hard work.
regards
Sina Gholoubi
I don’t have any tutorial about painting this kind of character, but I’ll have a word about it with Justine, the designer of these characters.
There already are two comprehensive courses for rigging and animation:
Rigging: https://en.tuto.com/after-effects/the-official-character-rigging-course-with-duik-bassel-after-effects,115371.html?cc=vyKT3i
Animation: https://en.tuto.com/after-effects/comprehensive-animation-course-principles-objects-characters-after-effects,112561.html?cc=vyKT3i
Coucou!
Vos animations ont l’air trop mignons! J’suis debutante, est-ce que vous suggerez que je fasse le cour “Comprehensive animation course: principles, objects, characters”? J’en ai hate d’apprendre! J’espere que vous me comprenez, desolee pour les fautes.
Bonjour !
oui cette formation explique exactement ce genre d’animations justement, avec les mêmes illustrations/personnages !
Hey, Duduf!
Thank you for this great post! And animations are very cool too! We create static illustrations on our website meantime but dynamic illustrations is what we want to move into in the future. I’m very happy I’ve found your blog.
[…] (2019). Behind the scenes: From illustration to animation!. [online] Available at: https://duduf.com/behind-the-scenes-animate-a-character-illustration/ [Accessed 10 Dec. […]